

Grow potatoes in a bucket by choosing a suitable bucket, preparing the soil, planting the potatoes, and providing proper care. Are you interested in growing potatoes but lack space in your garden?
Don’t worry, because you can easily grow potatoes in a bucket! Growing potatoes in a bucket is a convenient and space-saving method that allows you to enjoy homegrown potatoes even if you have limited garden space. This method is suitable for both beginners and experienced gardeners and requires minimal effort.
We will guide you through the simple steps to successfully grow potatoes in a bucket. From choosing the right type of bucket and preparing the soil to planting the potatoes and providing proper care, we will cover everything you need to know to have a bountiful harvest of fresh, homegrown potatoes. So let’s get started!

Credit: www.youtube.com
Choosing The Right Bucket
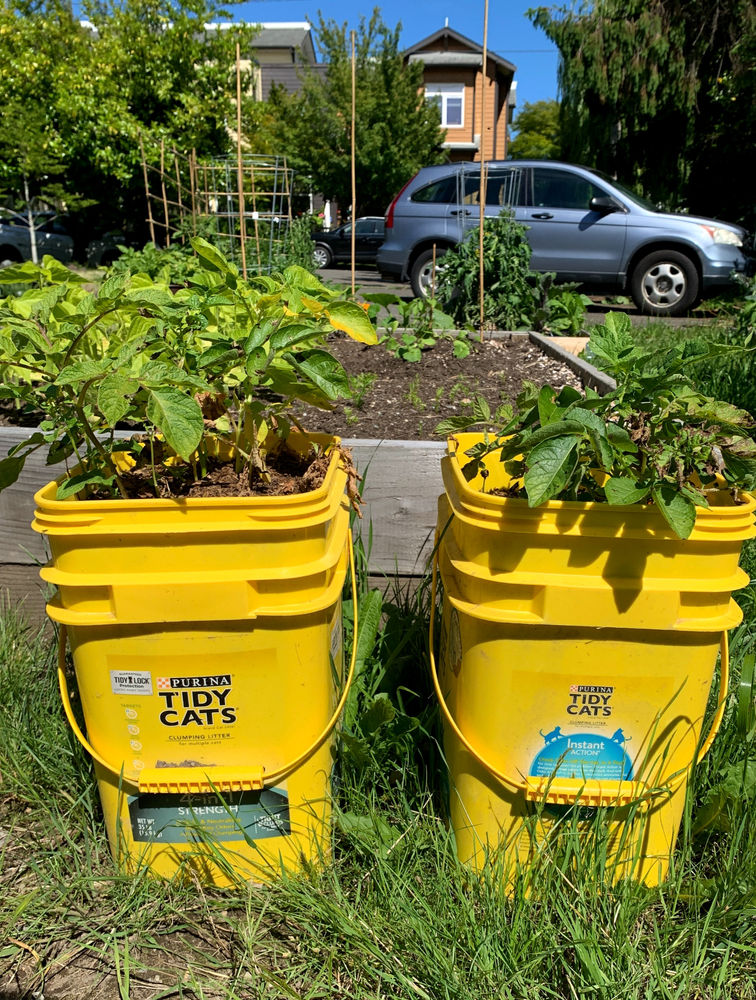
When it comes to growing potatoes in a bucket, choosing the right bucket is crucial for the success of your potato plants. The size and material of the bucket play significant roles in providing the optimal growing conditions for potatoes. Let’s find out more about how to select the right bucket for your potato-growing venture.
Size Of The Bucket
The size of the bucket you choose will directly impact the yield of your potato plants. It’s important to select a bucket that provides enough space for the potato plant to grow and develop a healthy root system. A 5-gallon bucket is often a popular choice among gardeners as it offers sufficient room for the potato plant while still being manageable in size.
The depth of the bucket is equally important as it determines the length of the potato tubers. A deeper bucket allows the roots to grow downwards, resulting in longer, more substantial potatoes. Aim for a bucket with a depth of at least 12 inches to encourage healthy and robust tuber growth.
Material Of The Bucket
The material of the bucket is another crucial factor to consider when growing potatoes. While there are various options available, it’s essential to choose a material that is durable, lightweight, and allows for proper drainage.
Plastic buckets are a popular choice among gardeners as they are lightweight, affordable, and come in various sizes. However, make sure to select food-grade buckets to avoid any potential chemical leaching into the soil.
If you prefer a more sustainable option, consider using a metal bucket. Metal buckets provide excellent durability and insulation for the potato plants, creating a favorable environment for their growth. Additionally, metal buckets can be reused for multiple growing seasons, making them a cost-effective and eco-friendly choice.
Regardless of the material you choose, ensure that the bucket has drainage holes at the bottom. Proper drainage is essential in preventing waterlogged soil, which can lead to rot and disease. Drill several holes in the bottom of the bucket to allow excess water to escape.
In conclusion, when growing potatoes in a bucket, selecting the right bucket is vital for your plants’ success. Consider the size and material of the bucket, ensuring it provides enough space for the plant to grow, has sufficient depth, and offers proper drainage. By choosing the right bucket, you’ll be on your way to harvesting a bountiful crop of delicious homegrown potatoes.

Credit: www.youtube.com
Preparing The Bucket
Growing potatoes in a bucket is a space-saving and accessible way to enjoy your own homegrown produce. However, preparing the bucket properly is essential to ensure a successful potato crop. There are a few key steps to follow to ensure your bucket is optimized for potato growth.
Drainage Holes
Before you do anything else, it’s crucial to ensure that your bucket has adequate drainage. Without proper drainage, your potatoes may become waterlogged, leading to rot and stunted growth.
To create efficient drainage for your potato bucket, drill or poke several small holes in the bottom of the container. These holes will allow excess water to escape, preventing waterlogged soil. A layer of gravel or small rocks at the bottom of the bucket can also help with drainage, ensuring that water can flow freely through the soil.
Filler Material
After creating drainage holes, it’s important to add a layer of filler material to the bottom of the bucket. This filler material not only aids in drainage but also helps in the overall growth and health of your potato plants.
Consider adding a layer of potting mix or compost over the gravel to provide a healthy growing environment for the potatoes. This layer should be approximately 4-6 inches deep to give the potato roots plenty of space to grow and access nutrients.
Selecting The Potato Variety
Choosing the right potato variety is crucial when growing potatoes in a bucket. Consider factors like size, growth habit, and taste to ensure a successful harvest.
Determining Growth Space
To grow potatoes successfully in a bucket, it’s important to consider the growth space required for each potato variety. Different varieties have different growth characteristics and space requirements, so it’s essential to determine the optimal amount of space for your chosen variety. This will ensure that your potatoes have enough room to grow without being overcrowded, resulting in healthier plants and a better potato yield.Choosing Disease-resistant Varieties
When selecting a potato variety to grow in a bucket, considering disease resistance is crucial. Some varieties are naturally more resistant to common potato diseases such as late blight or potato scab. By choosing disease-resistant options, you can minimize the risk of your potato plants being affected by these common issues, reducing the need for chemical treatments or interventions.Adhering To Html Syntax In Headings
To ensure that each H3 heading adheres to HTML syntax, it’s vital to use the proper HTML tags. In the example above, the H3 headings have been used with the following HTML syntax:Determining Growth Space
. The “id” attribute is added to the heading tag to provide a unique identifier, which can be used for internal linking or styling purposes. This syntax helps maintain consistency and structure in your website’s HTML code. Now that you understand the importance of selecting the right potato variety, determining growth space, choosing disease-resistant varieties, and adhering to HTML syntax for H3 headings, you can proceed with confidence in your potato-growing endeavors. With these considerations in mind, you’ll be well on your way to successfully growing and harvesting delicious potatoes in buckets.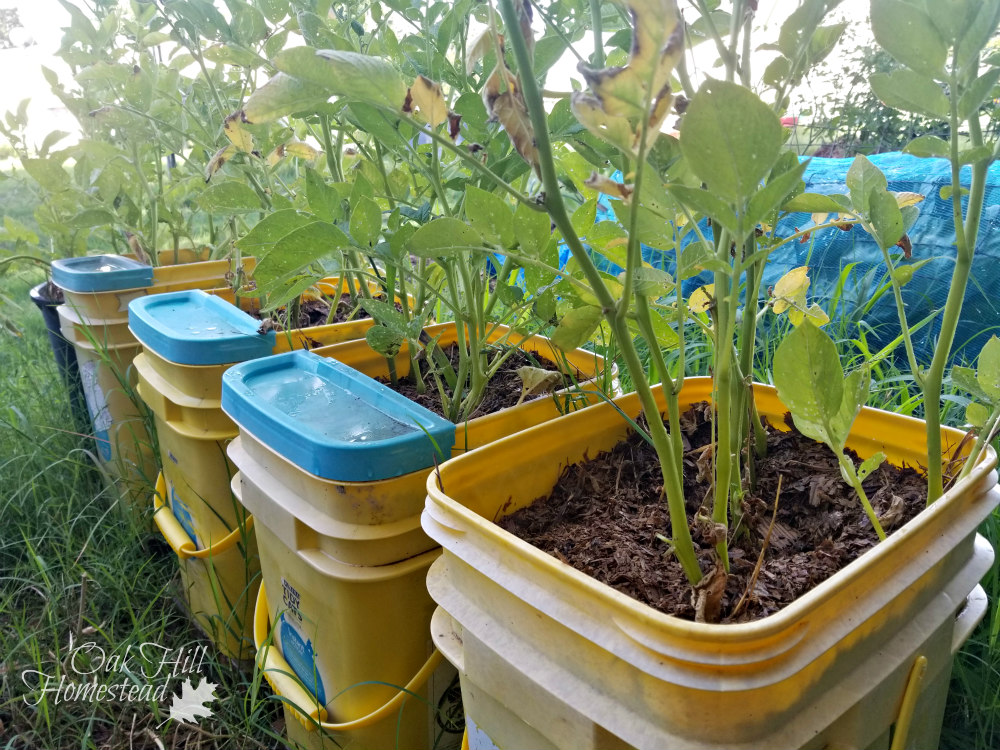
Credit: www.oakhillhomestead.com
Preparing The Potatoes
Get started on growing potatoes in a bucket by preparing them properly. Follow these simple steps to ensure your potatoes thrive in their new home.
Growing potatoes in a bucket is a great and efficient way to have fresh, home-grown potatoes even if you have limited space. When it comes to preparing the potatoes for planting, there are two key steps: chitting the potatoes and cutting the seed potatoes. These steps are crucial to ensure optimal growth and a bountiful harvest. Let’s dive into each of these steps in detail.Chitting The Potatoes
To chit the potatoes means to encourage the growth of sprouts before planting them. This step helps to ensure that the potatoes have a head start once they are in the ground. To chit the potatoes, follow these simple steps:- Choose your potatoes carefully. Look for ones that are firm, healthy, and not too sprouted.
- Place the potatoes in an egg carton or a tray with the end with the most eyes facing upwards.
- Keep the potatoes in a cool, well-lit area, but avoid direct sunlight.
- Allow the potatoes to chit for about two to four weeks, or until the sprouts are approximately 1 to 2 inches long. This will ensure that they are ready for planting.
Cutting Seed Potatoes
Cutting the seed potatoes is another key step in preparing them for planting. This process allows you to create multiple planting pieces from a single potato, maximizing your yield. Here’s how you can do it:- Select a sharp, clean knife for cutting the potatoes. Make sure it is free of any dirt or residue.
- Start by cutting the potatoes into smaller pieces, ensuring that each piece has at least two to three eyes or sprouts.
- Leave the cut pieces to dry for a day or two. This will prevent rotting and promote healing of the cut surface.
Planting And Caring For Potatoes
Growing potatoes in a bucket is a simple and efficient way to produce a bountiful harvest. When it comes to planting and caring for potatoes, it’s essential to follow specific steps to ensure a successful growing season. From planting the seed potatoes to watering, fertilizing, and hillling, each aspect plays a crucial role in the development of healthy potato plants.
Planting The Seed Potatoes
Before planting, ensure the seed potatoes have sprouts, and cut them into pieces with at least 2 eyes per piece. Place the pieces in the bucket with the cut side down, covering them with soil. As the plants grow, continue adding soil to the bucket, leaving the top few inches exposed.
Watering And Fertilizing
- Watering: Keep the soil consistently moist but not waterlogged. Ensure proper drainage, especially after heavy rain.
- Fertilizing: Use a balanced fertilizer when planting and then provide additional fertilizer as the plants grow. Avoid excessive nitrogen, as it can lead to excessive foliage growth at the expense of tuber development.
Hilling The Potatoes
Hilling involves mounding soil around the base of the potato plants as they grow. This encourages tuber development and also prevents the potatoes from being exposed to sunlight, which can cause them to turn green and produce solanine, a toxic compound. Hill the potatoes when the plants reach a height of 6-8 inches and continue to hill every few weeks as they grow taller.
Conclusion
Growing potatoes in a bucket is a convenient and space-saving method. With the right materials and care, anyone can enjoy a bountiful harvest of fresh potatoes right from their own backyard. Additionally, it’s an eco-friendly way to produce your own food while minimizing environmental impact.
Happy gardening!